Jelly Roll Rug Patterns offer a creative way to craft vibrant, durable rugs using pre-cut fabric strips. Popular for their ease and versatility, these patterns are perfect for beginners and experienced crafters alike, with many free PDF options available online.
1.1 What is a Jelly Roll Rug?
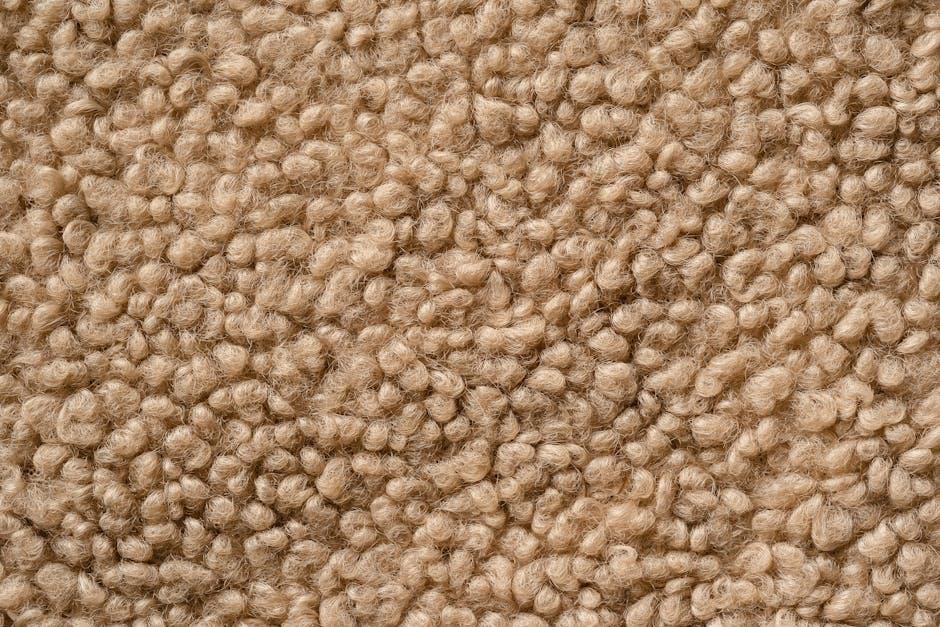
A Jelly Roll Rug is a creative sewing project made using pre-cut fabric strips, known as a Jelly Roll, which typically consists of 40-42 strips of 2.5-inch-wide fabric. These rugs are designed to be both decorative and durable, often featuring vibrant, coordinating colors. The rug is constructed by sewing the strips together in a spiral or coil pattern, then adding batting and a backing for stability. Jelly Roll Rugs are popular for their unique texture and versatility, allowing crafters to customize sizes and shapes. They are ideal for home decor, offering a handmade touch to any room. Free PDF patterns are widely available online, making it easy for crafters to get started.
1.2 Why Choose a Jelly Roll Rug Pattern?
A Jelly Roll Rug pattern is a popular choice for crafters due to its simplicity and creativity. It offers a cost-effective way to create a unique, handmade rug using pre-cut fabric strips. The pattern is ideal for beginners, as it requires minimal sewing skills and tools. With a Jelly Roll Rug pattern, you can easily customize the size, shape, and color scheme to match your home decor. Additionally, the use of pre-cut strips saves time on measuring and cutting fabric. Many free PDF patterns are available online, making it accessible for crafters of all levels. This project is also a great way to upcycle fabric scraps, adding an eco-friendly touch to your crafting;
1.3 Benefits of Using a Jelly Roll Rug Pattern PDF
Using a Jelly Roll Rug Pattern PDF offers numerous benefits for crafters. It provides clear, step-by-step instructions, making it easy to follow and complete the project. PDF patterns are instantly downloadable, saving time and allowing you to start your project immediately. Many free options are available online, reducing costs. The digital format is also eco-friendly and space-saving. Additionally, PDFs often include high-quality images and diagrams, ensuring accuracy. They can be easily shared or printed, making collaboration or teaching others simple. With a Jelly Roll Rug Pattern PDF, crafters can enjoy a seamless and enjoyable rug-making experience, perfect for both beginners and experienced sewists.

Materials and Supplies Needed
A jelly roll, batting, thread, and basic sewing tools are essential. The jelly roll typically includes 40 fabric strips, each 2.5 inches wide, perfect for rug-making.
2.1 Fabric Requirements: Jelly Roll Strips
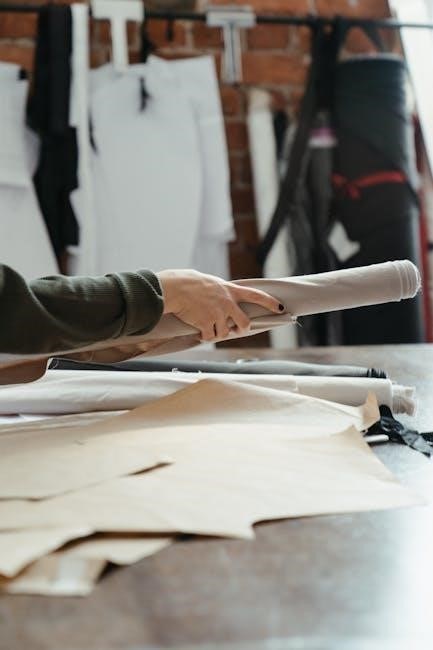
Fabric selection is crucial for a Jelly Roll Rug. A standard jelly roll contains 40 pre-cut strips, each 2.5 inches wide, ensuring vibrant colors and patterns. Choose strips that complement your home decor, as they form the rug’s foundation. Ensure all strips are consistent in width for even sewing. While cotton fabrics are most common, you can experiment with other materials for unique textures. Always pre-wash fabrics to prevent shrinkage after completion. Proper fabric choice and preparation ensure a professional finish and long-lasting durability for your rug.
2.2 Batting and Interfacing
For a Jelly Roll Rug, batting is essential for adding stability and comfort. It is typically cut to match the rug’s dimensions and placed between the fabric layers. Using high-quality batting ensures durability and a professional finish. Some patterns recommend interfacing for additional structure, especially in larger rugs. A popular time-saving notion is a tool that feeds strips and batting together seamlessly. Always pre-cut batting to size before starting your project to ensure smooth assembly. Proper use of these materials guarantees a sturdy and long-lasting rug.
2.3 Thread and Sewing Tools
When creating a Jelly Roll Rug, the right thread and sewing tools are crucial for a professional finish. Use a high-quality, neutral-colored thread to blend seamlessly with your fabric strips. Essential tools include a sewing machine, rotary cutter, and mat for precise strip cutting. A walking foot or Teflon foot can help manage thick fabric layers. Additional notions like scissors, pins, and a seam ripper are handy for adjustments. Investing in quality tools ensures durability and ease of assembly, making the sewing process enjoyable and efficient. Proper equipment is key to achieving a sturdy, long-lasting rug.
2.4 Additional Supplies for Finishing
For a polished look, gather additional supplies to complete your Jelly Roll Rug. Binding fabric or tape is essential for neat edges, while decorative trims or embellishments can add a personal touch. Batting clips or spray adhesive help secure layers during topstitching. A ruler or measuring tape ensures accurate cuts, and fabric glue can reinforce seams. Optional items like anti-slip backing or fabric paint allow customization. These finishing touches enhance both functionality and aesthetics, transforming your rug into a stunning, professional-grade piece. Having all supplies ready streamlines the final stages, ensuring a satisfying and beautiful result.
Understanding the Jelly Roll Rug Pattern
A Jelly Roll Rug Pattern guides you through creating a unique, spiral-designed rug using pre-cut fabric strips. It outlines strip piecing techniques and measurements for a polished finish.
3.1 How to Read the Pattern
Reading a Jelly Roll Rug Pattern involves understanding the layout, symbols, and instructions provided in the PDF. Most patterns include a materials list, cutting guide, and step-by-step sewing instructions. Pay attention to diagrams that illustrate how strips are arranged and sewn together to form the rug’s shape. The pattern may also include tips for aligning fabrics and maintaining consistent seam allowances. It’s important to follow the sequence of steps carefully to ensure the rug comes together smoothly. Many free PDF patterns are designed with clear visuals and concise language, making them accessible even for beginners. Always review the pattern thoroughly before starting your project.
3.2 Understanding Strip Piecing
Strip piecing is a fundamental technique in creating Jelly Roll Rugs, involving sewing together long fabric strips to form the rug’s foundation. This method allows for quick assembly of the rug’s structure. By aligning and sewing the 2.5″ wide strips end-to-end, you create a continuous piece of fabric that can be shaped into various forms, such as round or oval rugs. Proper alignment and consistent seam allowances are crucial to ensure the rug lies flat and even. Many free Jelly Roll Rug PDF patterns include detailed instructions on strip piecing, making it easy for crafters to achieve professional-looking results. This technique is both efficient and visually appealing, enhancing the overall design of the rug.
3.3 Importance of Precise Measurements
Precise measurements are crucial when working with Jelly Roll Rug patterns to ensure your project turns out as expected. Accurate cutting and sewing of the 2.5″ fabric strips guarantee that the rug lies flat and maintains its desired shape. Even small errors can lead to unevenness or misalignment, especially in round or oval designs. Using a ruler or seam gauge helps maintain consistent seam allowances. Many free PDF patterns include measurement guides to simplify the process. Attention to detail ensures a professional finish and prevents the need for costly corrections later. This step is foundational for achieving a polished, durable rug that complements any room decor.
Step-by-Step Guide to Making a Jelly Roll Rug
Start by preparing fabric strips, then sew them together, add batting, and topstitch for durability. Finally, bind the edges for a polished, professional finish.
4.1 Preparing the Fabric Strips
Begin by gathering 40 fabric strips, each 2.5 inches wide, from a jelly roll. Ensure all strips are pre-washed and dried to prevent shrinkage. Cut each strip to the desired length, typically around 44 inches, using a rotary cutter for precision. Remove any selvage edges to avoid bulkiness. If using a pattern, sort strips by color or design for a cohesive look. Some patterns offer shortcuts, like pre-cut strips, to save time. Once all strips are prepared, they are ready for sewing. Proper preparation ensures a smooth and even construction process for your jelly roll rug.
4.2 Sewing the Strips Together
Place two fabric strips right sides together, aligning the edges. Sew along the length using a 1/4-inch seam allowance. Continue adding strips one by one, pressing seams flat after each addition. For a straight rug, sew strips in a continuous chain, while a round rug requires sewing in a spiral pattern. Use a walking foot for smooth fabric handling. Ensure consistent tension to avoid puckering. As you sew, gently guide the fabric to maintain alignment. This step forms the foundation of your rug, so precision is key. Once all strips are sewn, you’ll have a long, continuous strip ready for shaping and finishing.
4.3 Adding Batting and Backing
Layer the batting and backing fabric, placing the sewn strips on top. Use a walking foot for smooth stitching, ensuring even tension to prevent bunching. Start by stitching along the center strip, then work outward, securing the layers together. This step adds stability and prevents shifting. Once stitched, the batting and backing will provide structure and durability to the rug. Ensure all edges are evenly aligned for a professional finish. This process is crucial for maintaining the rug’s shape and ensuring it lies flat. Properly securing these layers ensures your rug remains sturdy and comfortable underfoot.
4.4 Topstitching for Durability
Topstitching is a crucial step to enhance the rug’s durability and visual appeal. Using a contrasting thread color, stitch along the edges and key seams of the jelly roll strips. This reinforces the stitching and prevents fraying. A walking foot is recommended for smooth, even stitches. Start at one end, working methodically along the length, ensuring consistent spacing. Topstitching not only adds strength but also creates a polished finish. It’s essential for high-traffic areas, as it extends the rug’s lifespan. Properly executed topstitching ensures your jelly roll rug remains sturdy and attractive for years to come.
4.5 Binding the Edges
Binding the edges is the final step to complete your jelly roll rug, ensuring a polished and professional finish. Cut fabric strips for binding, typically 2-3 inches wide, and attach them to the rug’s perimeter. Fold the binding over the raw edges and stitch securely. Use a matching thread color to blend seamlessly. A walking foot is ideal for even stitching. For a decorative touch, contrast binding can add visual interest. Properly bound edges protect the rug from fraying and extend its lifespan. Ensure tight stitches for durability, especially in high-traffic areas. Binding completes the rug’s transformation into a beautiful, functional piece for your home.
Tips and Tricks for a Successful Jelly Roll Rug
Use rubber end caps to prevent fraying, maintain consistent tension while sewing, and align strips carefully. These tips ensure a professional finish and durability for your rug.
5.1 Common Mistakes to Avoid
When making a Jelly Roll Rug, avoid mismatched strip alignment, uneven tension, and incorrect batting placement. Incorrect strip alignment can lead to a misshapen rug, while uneven tension causes puckering or loose fabric. Improper batting may result in a lumpy finish. Additionally, not pre-washing fabrics can cause shrinkage issues. Ensure strips are sewn in the correct order and direction. Failure to press seams properly can distort the rug’s shape. Ignoring pattern instructions may lead to sizing errors. By addressing these common mistakes, you can achieve a professional, durable finish for your Jelly Roll Rug.
5.2 Troubleshooting Tips
Encounter issues with your Jelly Roll Rug? Start by checking fabric alignment and tension. Loose strips can cause puckering, while too much tension may distort the rug’s shape. If strips misalign, unsew and realign carefully. For uneven edges, trim excess fabric after sewing. If batting shifts, reposition and pin securely. To fix a wavy edge, adjust your sewing machine’s stitch length. Use a walking foot for smoother strip feeding. Press seams regularly to maintain a flat surface. For a misshapen rug, block it on a flat surface to reshape. These tips ensure a polished, professional finish for your project.
5.3 Time-Saving Notions
Streamline your Jelly Roll Rug project with these efficient tips. Pre-cut fabric strips eliminate cutting time, allowing you to focus on sewing. A specialized tool can help feed strips and batting through your machine continuously, saving effort. Keep materials organized and accessible to maintain workflow. Consider skipping pre-washing fabric if not necessary, to save time without compromising quality. These notions ensure a faster, smoother process, helping you complete your rug efficiently while maintaining a professional finish.
Designing Your Own Jelly Roll Rug Pattern
Unleash your creativity by designing a unique Jelly Roll Rug pattern. Choose vibrant fabrics, experiment with shapes, and add personalized details to reflect your style perfectly.
6.1 Customizing Colors and Fabrics
Customizing colors and fabrics is a key part of designing your Jelly Roll Rug pattern. Choose fabrics that match your home decor or personal style, ensuring a cohesive look. Consider seasonal themes or bold contrasts for visual appeal. Many free PDF patterns offer flexibility, allowing you to mix and match strips from different collections. Experiment with textures and patterns to add depth. Use online tools or fabric swatches to visualize your design. For inspiration, browse free tutorials and galleries showcasing unique rug creations. This step lets you personalize your project, making it truly one-of-a-kind and meaningful.
6.2 Creating Unique Shapes
Creating unique shapes for your Jelly Roll Rug adds a personal touch and visual interest. Beyond traditional rectangular or oval designs, you can craft round, hexagonal, or even angular rugs. Use a pattern or template to guide your shape, ensuring precise cuts and alignment. For round rugs, arrange strips in a spiral or concentric circles. For more intricate designs, layer strips at angles or experiment with curved seams. Adding batting and backing helps maintain shape stability; Free PDF patterns often include tips for achieving specific forms. With creativity, you can design a rug that complements any room’s decor, making it a standout piece in your home.
6.3 Adding Personalized Details
Personalizing your Jelly Roll Rug enhances its uniqueness and sentimental value. Consider adding appliqué, embroidery, or custom fabric selections to reflect your style or commemorate special occasions. Use contrasting threads to stitch names, dates, or meaningful symbols directly onto the rug. Incorporate leftover fabrics from other projects to add a personal touch. For a cohesive look, align your personalized details with the rug’s shape and color scheme. Free PDF patterns often include tips for integrating these elements seamlessly. Whether it’s a family name or a favorite motif, these details make your rug truly one-of-a-kind, turning it into a cherished home decor piece.

Variations and Creative Ideas
Explore creative variations like round, oval, or themed designs. Add borders or embellishments for a unique touch. Free PDF patterns offer inspiration for customizing your rug.
7.1 Round vs. Oval Jelly Roll Rugs
Round and oval jelly roll rugs are popular variations, each offering unique charm. Round rugs often feature continuous strip piecing, creating a seamless, circular design. Oval rugs, while similar, provide a more traditional shape. Both styles are customizable with free PDF patterns, allowing crafters to experiment with colors and layouts. Round rugs may require specific patterns, like RJ Designs’ circular option, while oval rugs often follow standard jelly roll techniques. Crafters can choose based on space and aesthetic preferences, making both shapes versatile for home decor. These variations highlight the flexibility of jelly roll rug patterns, offering something for every style and skill level.
7.2 Adding Borders or Embellishments
Adding borders or embellishments to your jelly roll rug can elevate its appearance and personalize the design. Borders provide a polished finish, extending the rug’s size or framing the pattern. Embellishments like appliques, quilting stitches, or decorative threads add texture and visual interest. Many crafters use contrasting fabric strips for borders or incorporate batting for a padded effect. These enhancements allow for creativity, making each rug unique. Free PDF patterns often include tips for adding borders and embellishments, guiding crafters to achieve professional-looking results. This step is optional but highly recommended for those seeking a more customized and eye-catching final product.
7.3 Seasonal and Themed Designs
Seasonal and themed designs add a personal touch to jelly roll rugs, making them perfect for holidays or special occasions. Crafters can choose fabric strips that match specific themes, such as Christmas colors for winter or pastel shades for spring. Many free PDF patterns include customization tips, allowing users to adapt designs for events like Halloween, Easter, or baby showers; Themed rugs can also reflect personal interests, such as sports or floral motifs. This versatility makes jelly roll rugs a great way to decorate spaces according to the season or personal style, ensuring a unique and meaningful finish for any room.
Finished Project Showcase
Crafters proudly display their completed jelly roll rugs online, showcasing vibrant designs and creative shapes. These examples inspire others to experiment with colors and patterns.
8.1 Examples of Completed Jelly Roll Rugs
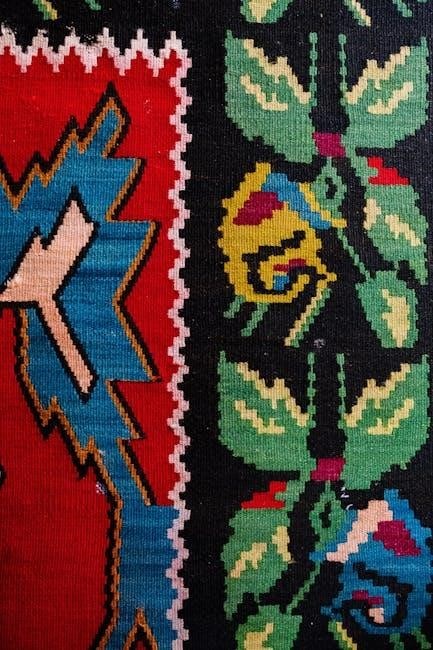
Crafters have created stunning jelly roll rugs in various designs, from vibrant round patterns to elegant oval shapes. One example features a Parquet design with rich colors, while another showcases a tree skirt made during a Jelly Roll Placemat class. A medium-sized oval rug finishes at approximately 30×44 inches, offering a cozy touch to any room. Some crafters have shared their projects online, displaying intricate details like binding edges and creative color combinations. These finished rugs highlight the versatility of jelly roll patterns, proving they can be both decorative and durable for indoor or outdoor use.
8.2 Sharing Your Project Online
Sharing your completed jelly roll rug project online is a wonderful way to inspire others and connect with crafters worldwide. Many crafters post their finished rugs on platforms like YouTube, Instagram, and quilting forums, showcasing their unique designs and color choices. These shares often include tips and tricks learned during the process, fostering a supportive community. Some creators even host tutorials or Q&A sessions, helping others overcome challenges. By sharing your project, you not only gain feedback but also contribute to the growing library of jelly roll rug inspiration, encouraging others to start their own creative journeys with these versatile patterns.
Discussion and Community Feedback
Crafters rave about jelly roll rug patterns, sharing their projects and tips online. Many find the process enjoyable and rewarding, with vibrant results inspiring others to create.
9.1 What Crafters Are Saying
Crafters enthusiastically share their experiences with jelly roll rug patterns, praising their simplicity and creativity. Many highlight the satisfaction of transforming fabric strips into vibrant, durable rugs. Some mention the ease of following free PDF tutorials, while others appreciate the versatility of customizing colors and shapes. A few crafters noted initial challenges with round rugs but found success after discovering specific patterns. The community actively shares tips and inspiration, encouraging others to try these projects. Overall, the feedback underscores the joy and accomplishment crafters feel in creating unique, functional pieces for their homes.
9.2 Popular Modifications and Hacks
Crafters often share creative hacks to enhance their jelly roll rugs. A popular modification is adding embellishments like appliqué or embroidery for a personalized touch. Some opt for round or oval shapes instead of traditional rectangles, while others experiment with themed fabrics for seasonal designs. Using pre-cut jelly rolls saves time, but crafters also suggest layering strips with batting for extra durability. A clever hack involves using a tool to feed strips and batting simultaneously, streamlining the sewing process. These modifications not only add uniqueness but also showcase the versatility of jelly roll rug patterns, making each project truly one-of-a-kind.
Jelly roll rug patterns offer a fun, creative way to craft durable, personalized rugs. With free PDF guides available, anyone can start making these vibrant, customizable designs easily today.
10.1 Summary of Key Points
Jelly roll rug patterns are a popular choice for crafters, offering a fun and creative way to repurpose fabric strips into durable, decorative rugs. These patterns often include step-by-step instructions, making them accessible to both beginners and experienced sewists. The use of pre-cut jelly roll strips simplifies the process, while free PDF patterns provide an affordable way to get started. Key materials include 40-42 fabric strips, batting, and thread, with optional tools like a walking foot for ease. The process involves strip piecing, precise measurements, and topstitching for durability. Many crafters emphasize the satisfaction of creating a personalized, functional piece for home decor, with endless customization options to match any style or theme.
10.2 Encouragement to Start Your Project
Starting your jelly roll rug project is an exciting venture! With free PDF patterns readily available, you can easily dive into this creative process. Many crafters find the rhythmic sewing of strips and the transformation of fabric into a functional piece deeply satisfying. Don’t hesitate to begin, even if you’re new to sewing—jelly roll rugs are a great way to build skills. Choose a pattern that resonates with you, gather your materials, and enjoy the journey. The sense of accomplishment you’ll feel when your rug is complete is incredibly rewarding. Join the crafting community and share your progress for inspiration and support. Give it a try—you’ll love the result!